Link to Tutorial
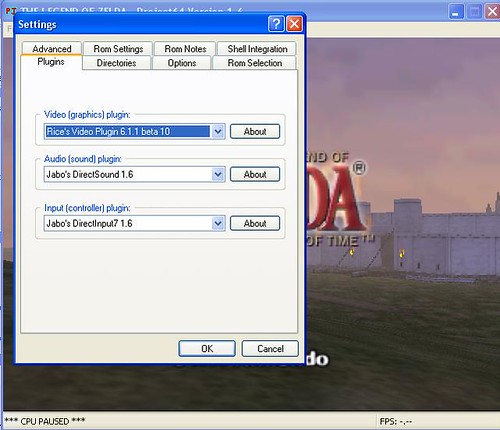 In Project 64, click options-->settings. In the Video (graphics) plugin choice you should now see Rice's as an option; choose it & press ok. Now click options-->configure graphics plugin. Click the general options tab & uncheck hide advanced options, also in this window click the Texture Filters tab & check both dump textures to file & check Load Hi-res textures if available. End the emulation & reopen the rom again in project 64, make sure both the checked boxes in the options we changed are still there. Play through all the way until you see the open saved file screen.
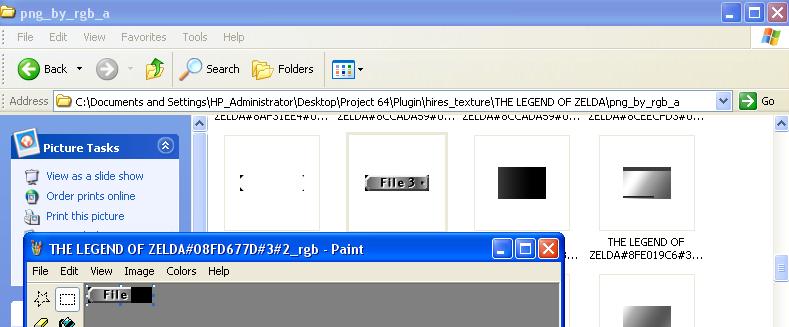
Now, in the project 64 folder open the plugin folder & from there open the texture_dump folder. You should see a folder called THE LEGEND OF ZELDA. We are going to do a basic interface texture edit. also in the plugin folder should be a folder named hires_texture. Move the THE LEGEND OF ZELDA folder inside here. open it, there should be 5 folders (these are all the textures that have dumped so far, the textures only dump from the parts of the game you've played through), open the one named png_by_rgb_a. Find one of the File Save buttons, I chose File 2 & open this in paint (photoshop or gimp are much better for future edits, gimp is free).
Just made a basic noticable edit & saved it.
Now open up the rom in project 64 again & make sure those 2 check marks are still up. Skip to the choose save file menu & see if your texture showed up :D. Note I changed the choose a save file text image too just for the heck of it.

No comments:
Post a Comment